Overview
You can add documents to Version Story a number of ways. Over time you may develop a preference for the approach that you find most convenient. This guide walks you through the options. All instructions will apply to both Windows and Mac unless noted otherwise.
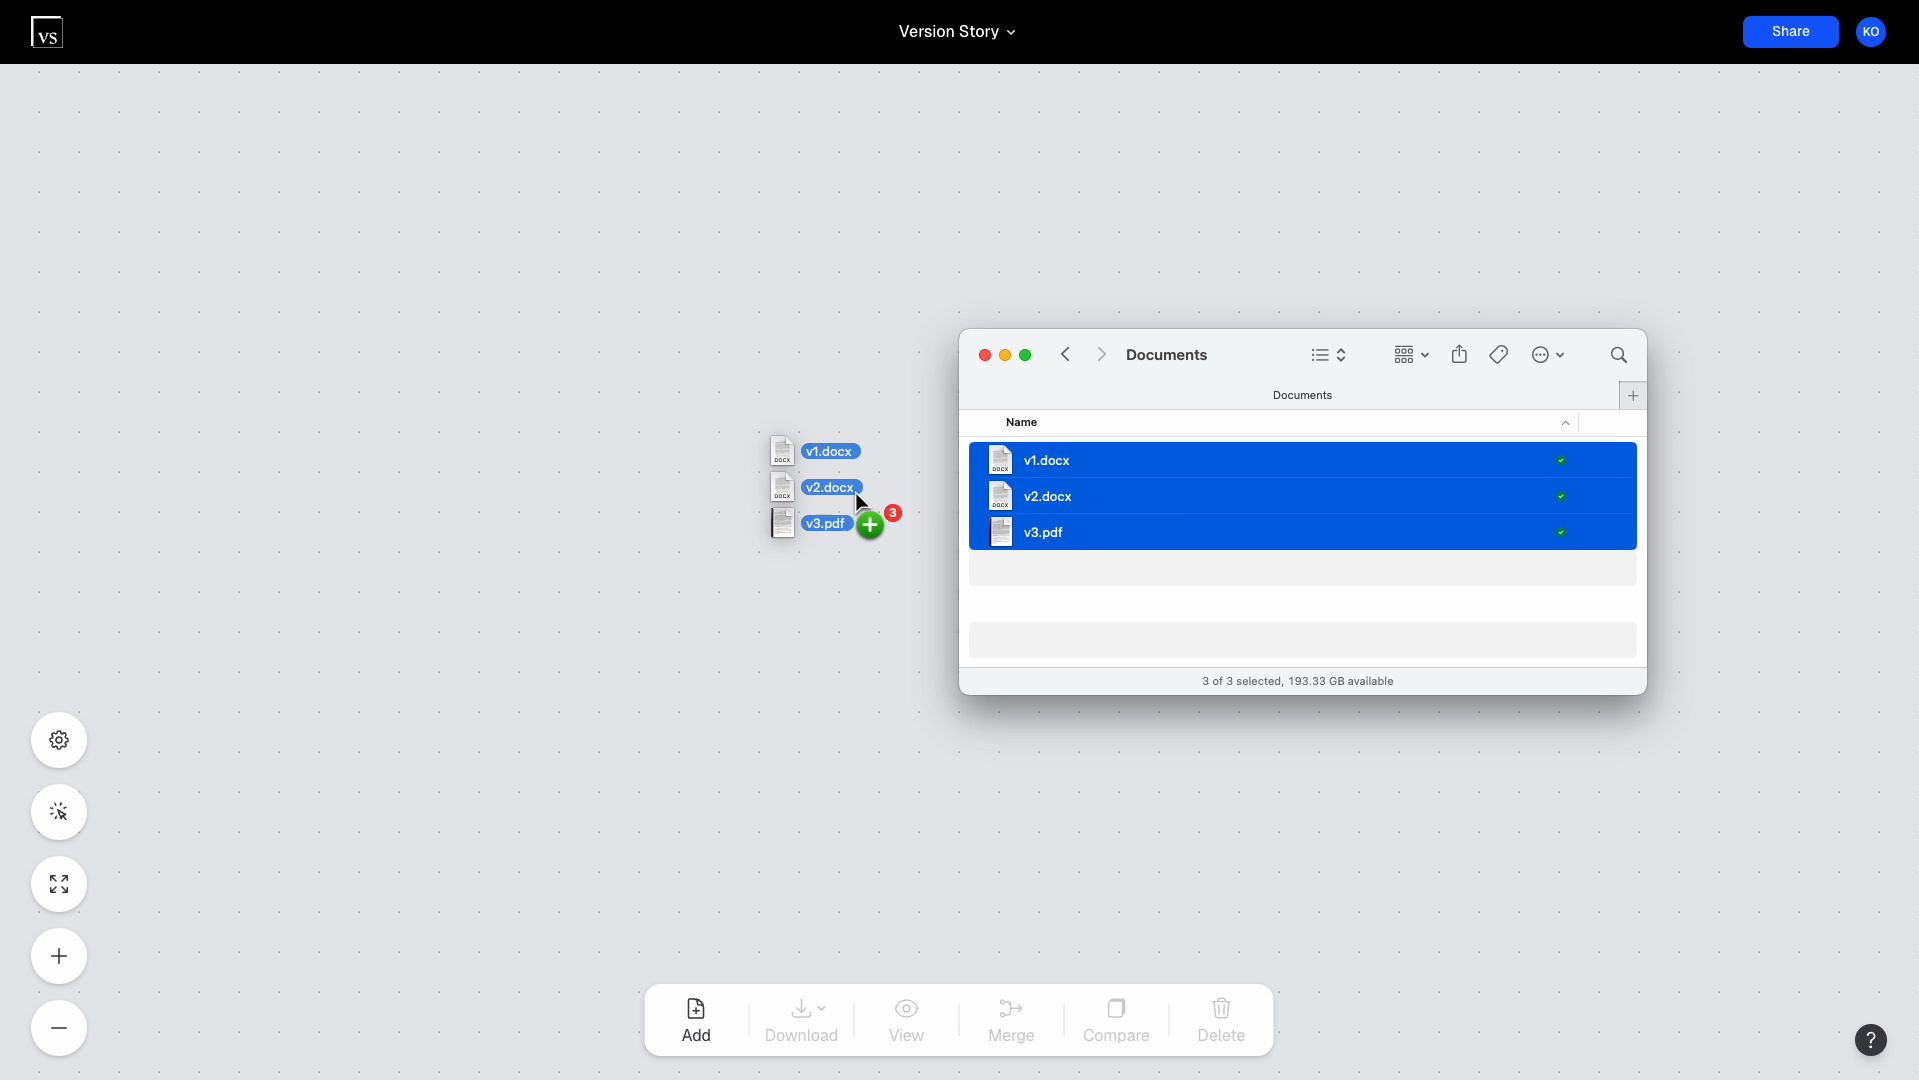
Drag and drop files from your computer onto the canvas
Open a folder on your computer with the files you want to add. Select one or more files in the folder, then drag and drop them onto the Version Story canvas.
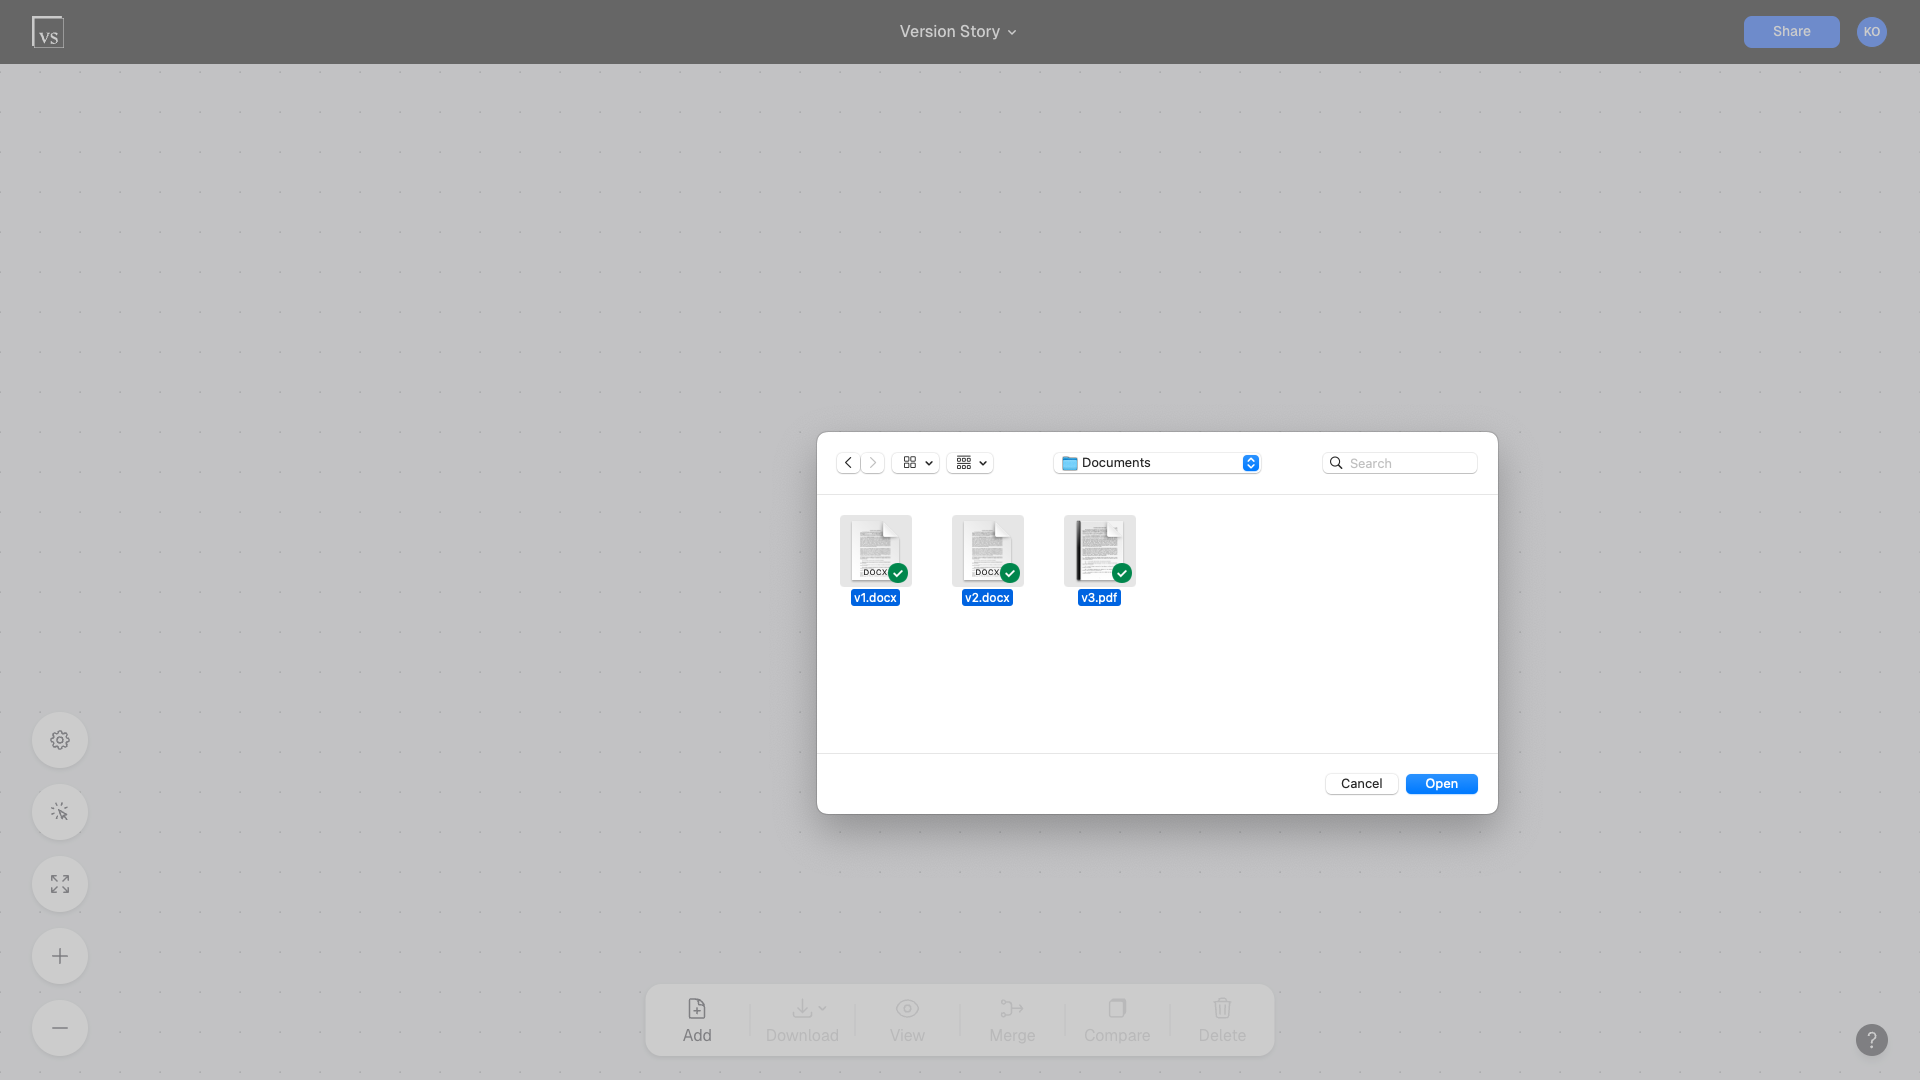
Click the "Add" button on the bottom toolbar
Click the button on the bottom toolbar that says "Add". This will open a file selection dialogue box. Find and select the document or documents that you want to add, then click "Open". The documents will be added to the Version Story canvas in a neatly organized row.
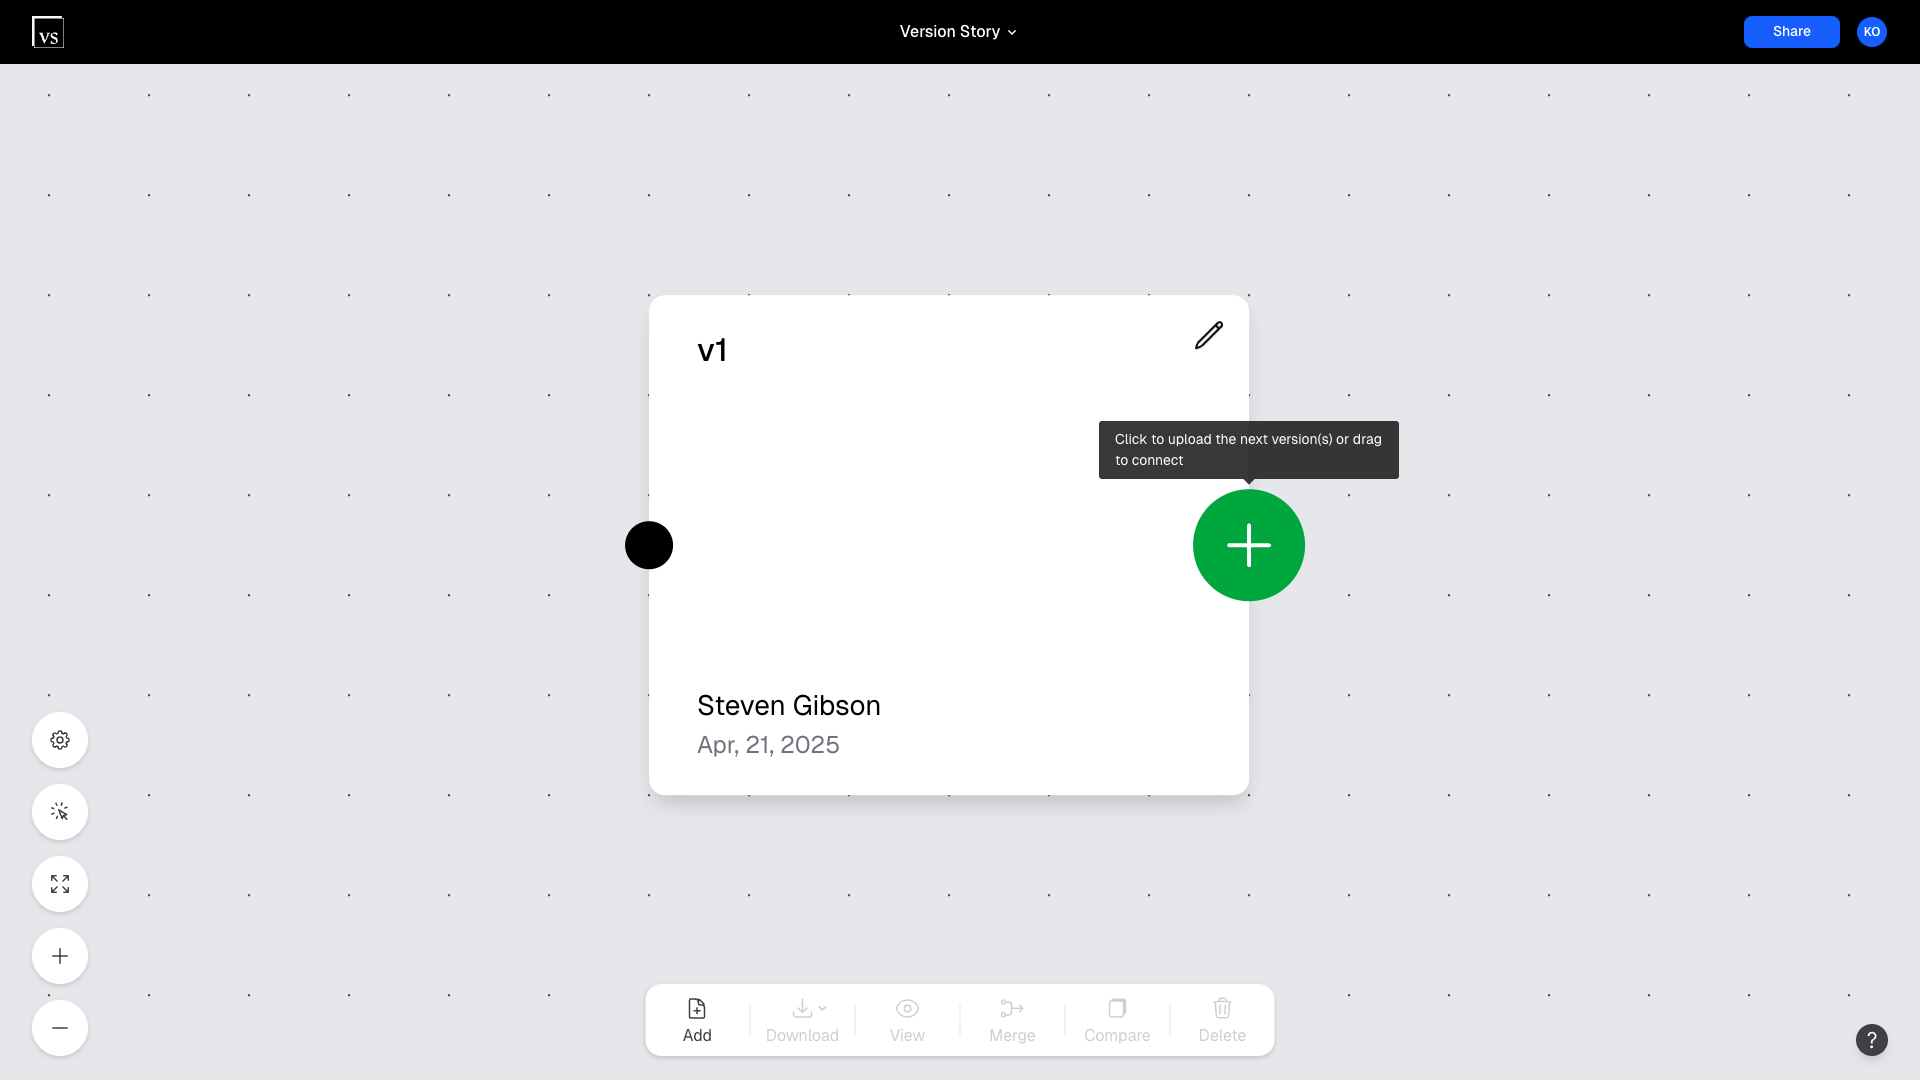
Click the plus (+) button on a canvas version
When you mouse over a canvas version, a plus (+) button will expand. Click on this to open a file selection dialogue. Any version or versions you select will be added with redlines automatically created.
Drag and drop attachments from Outlook onto the canvas
Find the email in Outlook with the documents you want to add. Then drag the documents from Outlook and drop them on the Version Story canvas.
Windows Only: Please note this only works on Windows.